TPO Roofing Installation: Complete Guide
TPO (thermoplastic polyolefin) roofing has become one of the most popular commercial roofing solutions in the United States, valued for its energy efficiency, durability, and cost-effectiveness. However, the long-term performance of any TPO roof depends heavily on proper installation techniques and attention to critical details during the application process. From substrate preparation to seam welding and final inspections, every phase of tpo roofing installation requires skilled crews, manufacturer-approved methods, and rigorous quality control to deliver a watertight system that performs reliably for decades.
Understanding TPO Membrane Systems
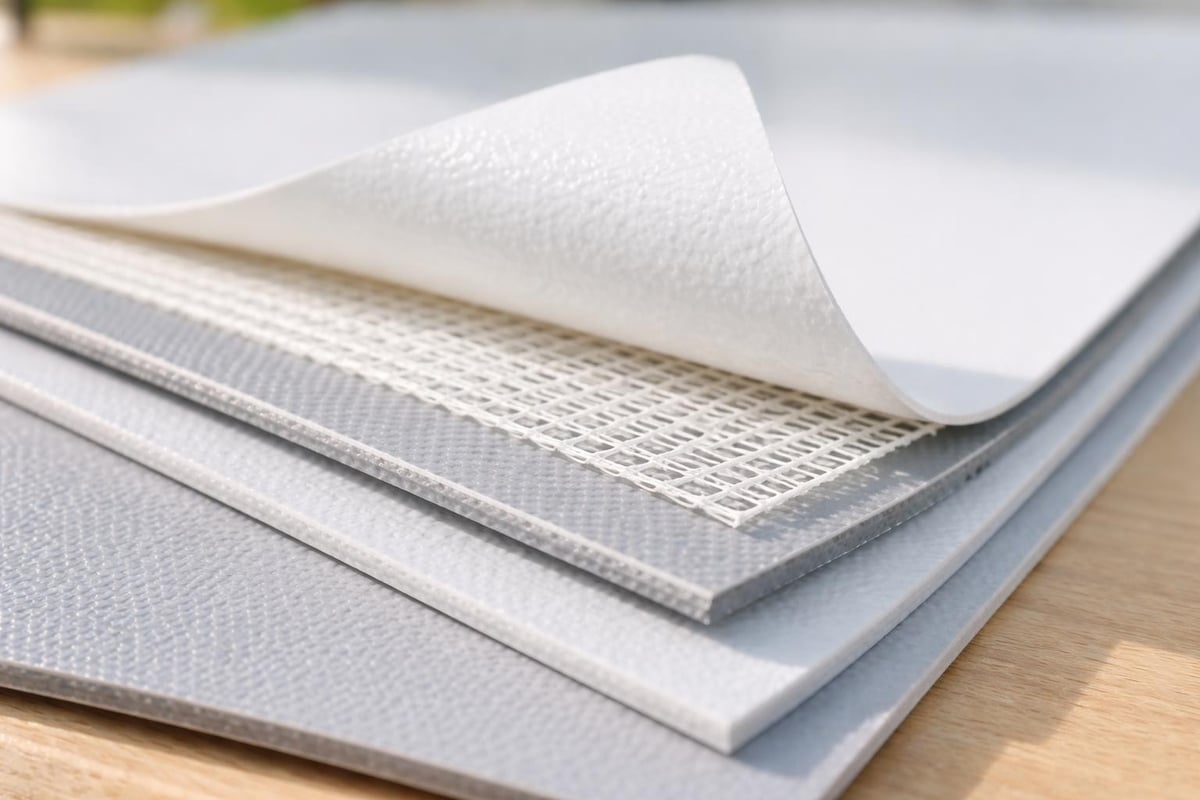
TPO roofing membranes are single-ply systems composed of thermoplastic polyolefin compounds that combine polypropylene and ethylene-propylene rubber. These white or light-colored membranes reflect solar radiation effectively, reducing cooling costs and meeting energy code requirements in most commercial applications.
The membrane typically ranges from 45 mils to 80 mils in thickness, with thicker options providing enhanced puncture resistance for high-traffic roof areas. Most commercial installations use 60-mil membranes as the standard specification, balancing durability with cost considerations.
Key Membrane Characteristics
- Heat-weldable seams that create watertight bonds stronger than the membrane itself
- UV resistance that maintains flexibility and performance over extended periods
- Chemical resistance suitable for environments with industrial exhaust or pollutants
- Flexibility in cold temperatures compared to PVC alternatives
- Lightweight construction that minimizes structural load requirements
Property owners considering Commercial Roofing Systems should understand that TPO offers excellent value when installed correctly by experienced crews following manufacturer specifications.
Pre-Installation Planning and Substrate Preparation
Successful tpo roofing installation begins long before the first membrane roll reaches the roof deck. Thorough planning and meticulous substrate preparation establish the foundation for long-term system performance.
The existing roof deck must be structurally sound, dry, and free from contaminants that could compromise adhesion or cause membrane degradation. Professional contractors conduct comprehensive inspections to identify soft spots, moisture infiltration, and areas requiring reinforcement or replacement.
Critical Preparation Steps
- Remove existing roofing materials down to the structural deck if performing a complete tear-off
- Inspect deck surfaces for deterioration, damage, or inadequate fastening
- Replace damaged deck sections with new materials matching existing specifications
- Install approved insulation layers following manufacturer R-value requirements and attachment patterns
- Verify proper drainage by confirming positive slope toward drains and scuppers
- Install cover boards when specified to protect insulation and enhance puncture resistance
Moisture surveys using infrared thermography or nuclear testing help identify wet insulation that requires removal. Installing new TPO membrane over saturated substrate leads to premature system failure and voided warranties.
The installation guidelines provided by TPO manufacturers emphasize proper substrate conditions as the most critical factor in achieving long-term waterproofing performance.
Attachment Methods and Fastening Patterns
TPO membranes can be secured using three primary attachment methods, each offering distinct advantages depending on building requirements, budget constraints, and performance expectations. The attachment method significantly impacts wind uplift resistance and overall system longevity.
| Attachment Method | Description | Best Applications | Wind Resistance |
|---|---|---|---|
| Fully Adhered | Bonded to substrate with adhesive | High wind zones, occupied buildings | Excellent |
| Mechanically Attached | Fastened through membrane or plates | Most commercial applications | Good to excellent |
| Ballasted | Held by stone or pavers | Low wind areas, limited penetrations | Moderate |
Mechanically Attached Systems
Most commercial tpo roofing installation projects utilize mechanical attachment due to its balance of performance, installation speed, and cost efficiency. Specialized fasteners and plates secure the membrane to the deck at prescribed spacing intervals determined by wind zone calculations.
Installation crews must follow precise fastening patterns outlined in the manufacturer's specifications and approved engineering drawings. Fastener placement density increases near roof perimeters, corners, and high-stress areas where wind uplift forces concentrate.
- Fasteners must penetrate approved deck materials to specified depths
- Plate spacing typically ranges from 12 to 20 inches on center
- Perimeter zones require increased fastener density
- All fasteners must be installed perpendicular to the deck surface
The comprehensive TPO installation guide details fastening requirements for various deck types and wind exposure categories.
Heat Welding Procedures and Seam Quality Control
Heat-welded seams represent the most critical component of any TPO roofing system, as improper welding accounts for the majority of leak failures in mechanically attached installations. TPO's thermoplastic properties allow membranes to be fused together using hot air welders, creating molecular bonds stronger than the base membrane.
Welding Equipment and Techniques
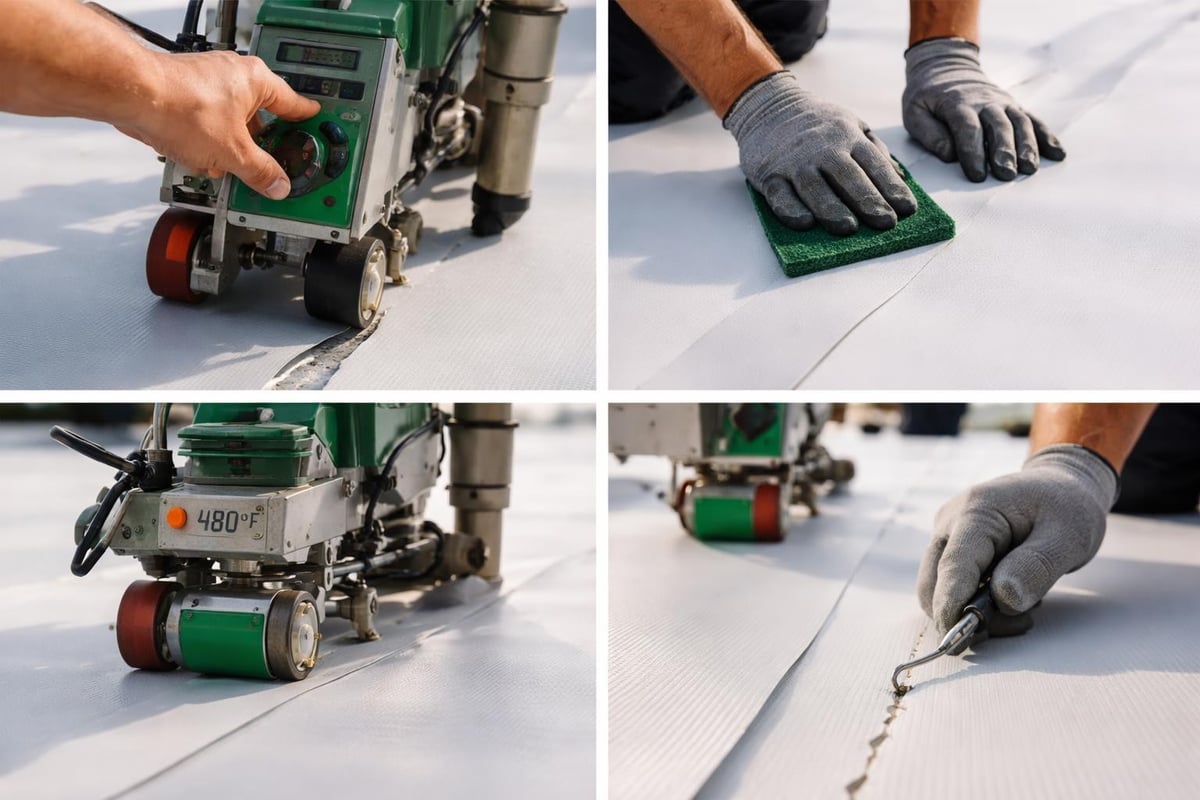
Automatic welding machines provide consistent temperature control and uniform pressure, producing superior seams compared to hand-welding methods. These machines travel along membrane overlaps at controlled speeds while delivering precisely heated air to melt the TPO surfaces.
Typical welding parameters include:
- Temperature settings between 900°F and 1,100°F depending on ambient conditions
- Welding speeds from 3 to 10 feet per minute based on membrane thickness
- Overlap widths of 2.5 to 3 inches for field seams
- Dual-track welding for enhanced redundancy in critical applications
Hand welders serve for detail work around penetrations, edges, and areas inaccessible to automatic equipment. Skilled technicians must maintain steady speeds and consistent pressure to achieve proper fusion without burning or under-welding the membrane.
Seam Testing Protocols
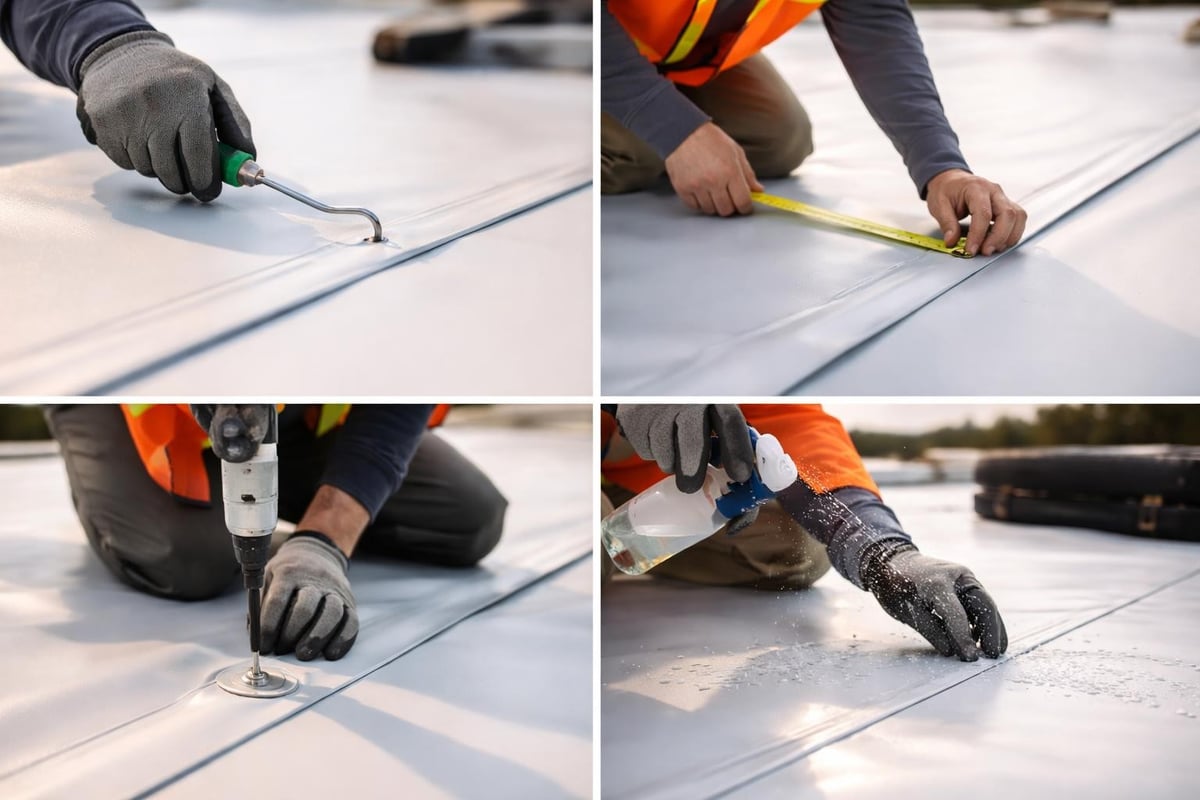
Quality control during tpo roofing installation requires systematic seam testing to verify watertight integrity. Every seam must be probed and tested according to manufacturer requirements and industry standards.
- Visual inspection immediately after welding to identify obvious defects
- Probe testing using a blunt tool to check seam edges for separation
- Test weld samples performed at the start of each shift and when conditions change
- Destructive testing of sample cuts to verify proper fusion depth
- Documentation of all testing results for warranty compliance
Failed seams require immediate repair by cutting out defective sections and re-welding with proper overlap and technique. Fort Worth contractors working in variable weather conditions must adjust welding parameters based on membrane temperature, wind speed, and humidity levels.
Flashing Details and Penetration Management
Proper flashing installation around roof penetrations, walls, and transitions prevents the majority of leak issues in TPO systems. These vulnerable areas require careful attention to detail and adherence to manufacturer-approved methods.
Common Penetration Types
- Pipe flashings and vents
- HVAC curbs and equipment supports
- Parapet walls and coping caps
- Expansion joints
- Roof drains and overflow scuppers
- Electrical conduits and mast supports
Each penetration requires custom flashing fabricated from TPO membrane material and heat-welded to the field membrane with minimum 6-inch overlaps in all directions. Pre-fabricated flashings speed installation and improve consistency compared to field-fabricated details.
The detailed Tremco installation manual provides specific flashing configurations for virtually every penetration scenario encountered in commercial construction.
Inside and outside corners present particular challenges requiring careful membrane manipulation to avoid wrinkles, fish-mouths, and stress concentrations. Installing these details correctly demands experienced crews familiar with TPO's handling characteristics and proper cutting techniques.
Field Quality Assurance and Final Inspections
Comprehensive quality assurance throughout the tpo roofing installation process ensures the completed system meets performance specifications and warranty requirements. In-house crews maintain accountability and consistency that subcontractor-based operations struggle to match.
Daily Quality Checkpoints
- Verify proper membrane alignment before fastening
- Monitor welding temperatures and adjust for conditions
- Test seam strength at regular intervals
- Document weather conditions and installation progress
- Photograph critical details and completed sections
- Address deficiencies immediately before proceeding
Final inspections should involve both the contractor's quality control team and the building owner's representative. This collaborative approach identifies any remaining concerns and confirms the installation meets contract specifications.
| Inspection Area | Key Verification Points |
|---|---|
| Membrane Surface | No tears, punctures, or contamination |
| Seams | Fully welded, tested, and documented |
| Flashings | Proper overlap, no voids or separations |
| Drainage | Water flows freely to drains |
| Fasteners | Correct density, proper penetration |
| Accessories | Walkway pads, pitch pans properly installed |
The inspection process should reference what property owners should expect from professional roof inspection services to ensure transparency and thorough documentation.
Weather Considerations and Seasonal Installation Challenges
Environmental conditions significantly impact tpo roofing installation success, requiring contractors to adapt procedures and sometimes postpone work when conditions fall outside acceptable parameters. Temperature and precipitation present the most critical weather-related challenges.
Temperature Requirements
TPO membranes become increasingly stiff in cold temperatures, making them difficult to manipulate and prone to cracking during handling. Most manufacturers specify minimum ambient and membrane temperatures between 40°F and 50°F for installation activities.
Cold weather installations require:
- Extended membrane relaxation periods before cutting and fitting
- Increased welding temperatures to compensate for heat loss
- Additional seam testing to verify proper fusion
- Heated storage for membrane rolls before deployment
Hot weather above 90°F creates different challenges, as membranes become excessively pliable and prone to stretching. Dimensional stability suffers when membranes are installed while overheated, leading to wrinkles and stress concentrations as temperatures normalize.
Moisture and Precipitation
Rain, snow, and morning dew must be completely absent from roof surfaces during installation. Even minor moisture trapped beneath the membrane causes adhesion failures in fully-adhered systems and promotes deck deterioration in all attachment methods.
Professional crews monitor weather forecasts continuously and maintain flexible scheduling to maximize productive installation windows. The American WeatherStar guide to TPO roofing discusses how environmental factors affect long-term membrane performance.
Accessory Installation and System Components
Complete TPO roofing systems include various accessories that enhance functionality, protect high-traffic areas, and facilitate maintenance activities. These components integrate with the membrane through heat welding or mechanical attachment methods.
Essential TPO Accessories
- Walkway pads protect membrane from foot traffic damage
- Pipe boots provide watertight seals around plumbing vents
- Inside/outside corner patches reinforce stress concentration points
- T-joint patches strengthen three-way seam intersections
- Termination bars secure membrane edges at walls and curbs
Installing accessories requires the same attention to detail as primary membrane installation. Each component must be properly aligned, completely welded, and tested for waterproof integrity.
The video demonstration of TPO vent installation shows proper techniques for integrating penetrations into the membrane field while maintaining watertight performance.
Common Installation Errors and Prevention Strategies
Even experienced contractors occasionally encounter installation challenges that compromise system performance if not identified and corrected promptly. Understanding common errors helps crews maintain quality standards throughout the project.
Frequent TPO Installation Mistakes
- Insufficient seam overlap reducing fusion area and strength
- Inconsistent welding temperatures causing weak or burned seams
- Inadequate substrate preparation allowing moisture or debris underneath membrane
- Improper fastener spacing reducing wind uplift resistance
- Wrinkled membrane installation creating stress points and water ponding
- Skipped seam testing allowing defective welds to remain undetected
Prevention requires comprehensive crew training, strict adherence to manufacturer specifications, and systematic quality control at every installation phase. Contractors should reference manufacturer resources and maintain current certifications in TPO installation techniques.
When working with experienced roofing companies in Texas, property owners gain access to crews familiar with regional climate challenges and proven installation methodologies.
Long-Term Performance Factors and Warranty Compliance
The ultimate measure of successful tpo roofing installation is decades of leak-free performance with minimal maintenance requirements. Proper installation techniques directly determine whether TPO systems achieve their expected 20 to 30-year service life.
Warranty Requirements
Manufacturer warranties typically require:
- Installation by certified contractors using approved methods
- Specified membrane thickness and reinforcement type
- Compatible insulation and cover board materials
- Proper flashings at all penetrations and transitions
- Documented quality control testing results
- Annual maintenance inspections
Non-compliance with installation specifications voids warranty coverage, leaving property owners responsible for premature failures and repair costs. Selecting contractors who prioritize documentation and follow manufacturer guidelines protects this valuable warranty coverage.
Performance also depends on proper system design matching the building's specific requirements. Inadequate insulation, insufficient drainage slope, or inappropriate membrane thickness compromise longevity regardless of installation quality.
Maintenance Access and Future Serviceability
Well-planned tpo roofing installation considers future maintenance needs and facilitates efficient repairs when required. Strategic access planning reduces maintenance costs and extends system life.
Installing permanent walkway pads along common access routes protects the membrane from wear while guiding maintenance personnel away from vulnerable areas. Properly located equipment supports and sufficient clearances around mechanical units enable filter changes and routine service without membrane damage.
Documentation packages should include detailed roof plans showing:
- Membrane attachment patterns and fastener locations
- Insulation types and R-values
- Flashing details at all penetrations
- Drain and scupper locations
- Warranty information and maintenance requirements
This documentation proves invaluable when addressing flat roof repair needs or planning future improvements to the roofing system.
TPO roofing installation demands skilled crews, proper planning, and unwavering attention to quality standards throughout every project phase. Property owners throughout the Fort Worth area can depend on experienced contractors who prioritize manufacturer specifications, comprehensive testing, and transparent communication. When your commercial property needs reliable roofing solutions delivered by in-house teams backed by solid warranties, Texcore Construction provides the craftsmanship and accountability that ensure long-term performance and peace of mind.