Roof Replacement Guide: Expert Tips for 2026 Success
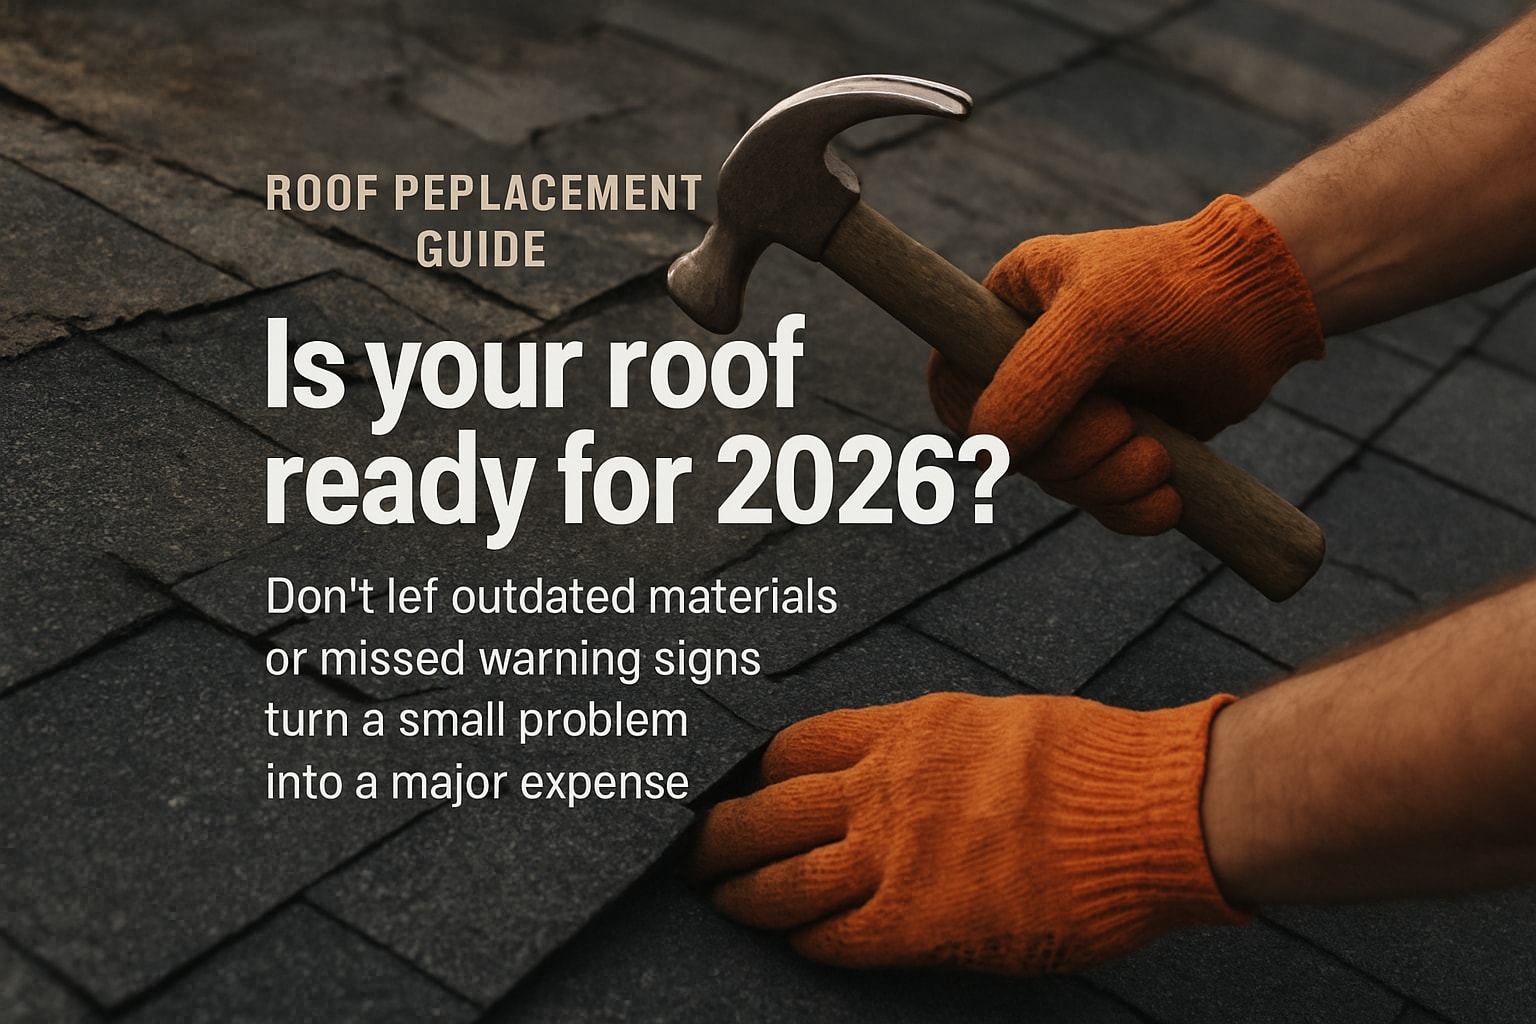
Is your roof ready for 2026? Small roofing problems can quickly escalate, leaving you facing unexpected costs and stress. Roof replacement is one of the most important investments you can make to protect your home or business while boosting property value and ensuring safety for everyone inside.
Ignoring early warning signs increases the risk of leaks, structural damage, and expensive repairs. On the other hand, a timely, well-planned roof replacement provides security and peace of mind for years to come.
This comprehensive guide will walk you through every step of the process. You will learn how to recognize when it is time for a new roof, understand costs and materials, plan and prepare, navigate the replacement process, and maximize your new roof’s value with expert post-installation tips.
Recognizing When It’s Time for Roof Replacement
Is your roof showing its age or suffering from subtle damage? Identifying the right moment for a roof replacement can save you from unexpected headaches and costly repairs. By paying attention to visible warning signs and scheduling regular inspections, you can protect your property’s structural integrity and value.
Key Signs Your Roof Needs Replacement
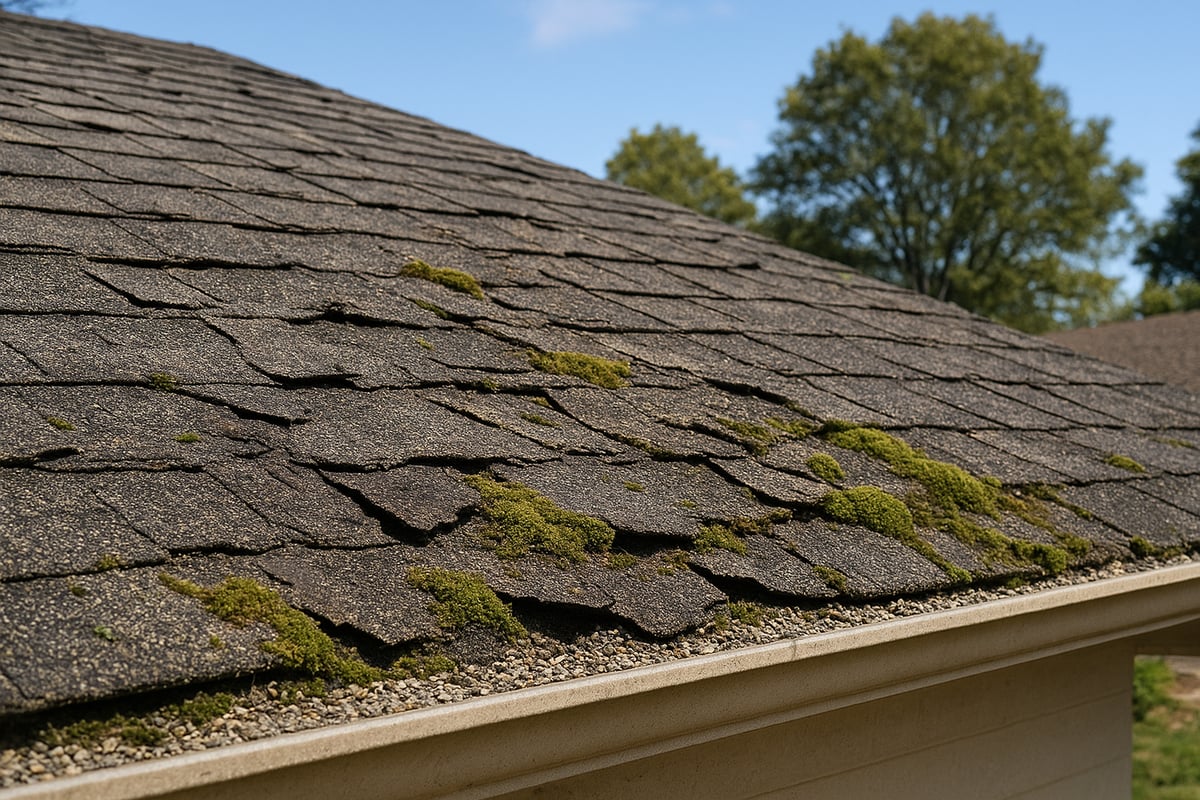
Recognizing the early warning signs is essential for timely roof replacement. Start by looking for these visible issues:
- Curling, cupping, cracked, or missing shingles are obvious red flags that your roof may be compromised.
- Accumulation of shingle granules in gutters signals advanced wear and a loss in protective strength.
- If your roof is approaching or past 20 to 25 years (for asphalt shingles), it’s at the end of its expected service life. Other materials have varying lifespans.
- Noticeable light entering the attic or water stains on ceilings can indicate leaks or failing underlayment.
- A sagging roof deck or soft spots underfoot point to moisture damage or structural weakness.
- Frequent leaks or the need for repeated repairs often suggest the need for full roof replacement.
- Mold, moss, or algae growth means moisture is being retained, which can accelerate deterioration.
For example, a 22-year-old asphalt shingle roof with visible granule loss and recurring leaks is a strong candidate for immediate roof replacement. Addressing these signs early helps prevent more severe damage and higher expenses.
Assessing Roof Condition: Inspection Tips
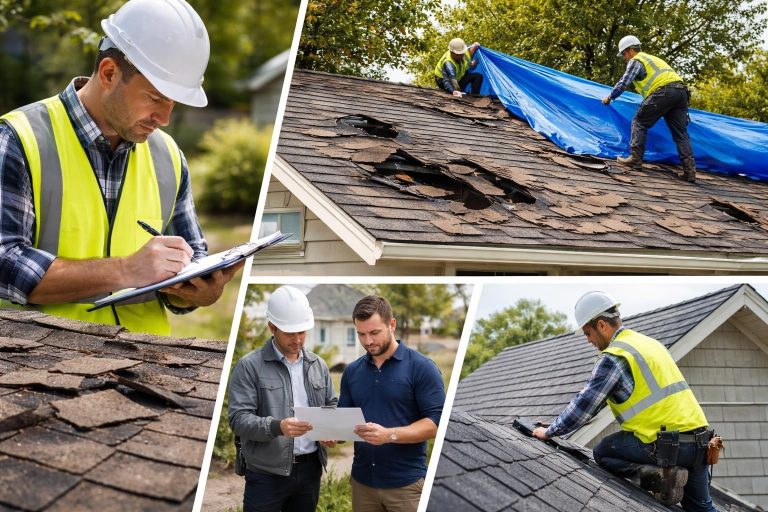
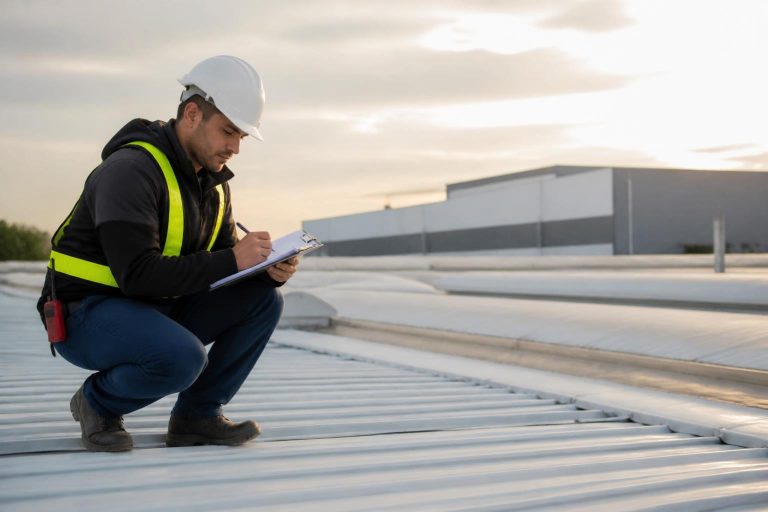
A thorough inspection is crucial for determining if a roof replacement is necessary. While some homeowners attempt DIY checks, professional inspections offer a more complete assessment.
- Pros use specialized tools and have experience spotting hidden damage.
- Examine attic ventilation and insulation for signs of trapped moisture or heat loss.
- Inspect flashing, valleys, and roof penetrations for corrosion, cracks, or gaps where water can enter.
- Document findings with photos to support insurance claims and contractor discussions.
- Advanced methods like drones or infrared cameras can reveal issues in hard-to-see areas.
Schedule roof inspections annually and after major storms. For example, a post-hailstorm inspection might reveal underlayment damage that is not visible from the ground. According to industry data, roofs older than 20 years are three times more likely to fail during severe weather.
Knowing when to choose between repair and roof replacement is vital, especially for commercial property owners. For a detailed comparison, visit Commercial Roofing Repair vs Replacement to help guide your decision process.
By staying proactive and informed, you ensure your roof remains a reliable barrier against the elements.
Roof Replacement Costs and Budgeting for 2026
Replacing your roof is a significant investment, but understanding the costs and budgeting wisely can help you avoid surprises. Careful planning ensures your roof replacement delivers long-term value and peace of mind.
Understanding Roof Replacement Pricing Factors
Several variables impact the final price of a roof replacement. The most critical factor is the type of roofing material you choose. For example, asphalt shingles typically cost $3 to $6 per square foot, while metal, tile, or slate can be significantly higher. The size, pitch, and complexity of your roof also play a major role. Steep or intricate roofs may increase labor and material costs by 15 to 30 percent.
Other important factors include local labor rates, regional price differences, and whether you're removing the old roofing or installing a new layer over the existing one. Permit fees, required inspections, and unexpected repairs, such as replacing damaged decking or flashing, should also be considered. Emergency or expedited services can further increase your roof replacement expenses.
| Material Type | Average Cost (per sq ft) | Lifespan |
|---|---|---|
| Asphalt Shingle | $3–$6 | 20–25 years |
| Metal | $7–$14 | 40–70 years |
| Tile/Slate | $10–$25 | 50+ years |
For example, a steep-pitched roof with multiple valleys and chimneys will require more labor and materials, raising the roof replacement cost compared to a simple, low-slope design.
Comparing Full vs. Partial Roof Replacement
When facing roof issues, homeowners often weigh the benefits of a full roof replacement versus a partial replacement. A full replacement involves removing all existing materials and addressing any hidden structural problems. This approach ensures uniform appearance, long-term performance, and keeps warranties intact.
Partial roof replacement is limited to damaged sections, which can be cost-effective if the rest of the roof is in good condition. However, matching new materials to the existing roof can be difficult, leading to a mismatched appearance. Fixed costs like permits and debris removal may make the price per square foot higher for partial jobs.
Partial replacement may make sense after isolated storm damage or when the roof is relatively new. However, risks include voided warranties and missed underlying issues. Data shows the national average for a full roof replacement ranges from $5,848 to $12,879, while repairs average $382 to $1,829. Weighing these options carefully ensures your roof replacement investment delivers the best value.
Budgeting, Financing, and Insurance Considerations
Accurate budgeting for a roof replacement means estimating the total project cost and setting aside a 10 to 20 percent contingency for unforeseen issues. Explore financing options such as contractor financing, home equity loans, or credit cards if needed.
If your roof replacement is due to storm or hail damage, you may qualify for an insurance claim. The process requires thorough documentation, including photos and inspection reports. Choosing a contractor experienced in the insurance process can streamline your claim. For details on the claim process, visit Roofing Insurance Claims in Fort Worth.
Warranties are another crucial consideration. Understand the difference between material and labor warranties, and check for exclusions related to improper maintenance or ventilation. Additional costs, such as gutter or flashing repairs and ventilation upgrades, should be factored into your roof replacement budget.
For example, a homeowner who secures financing and receives insurance coverage for 60 percent of storm-related losses can manage the investment more effectively. Industry estimates suggest that in storm-prone areas, approximately 70 percent of roof replacement projects involve insurance claims.
Choosing the Right Roofing Materials for 2026
Selecting the best materials for your roof replacement is a pivotal decision that impacts your property's value, safety, and energy efficiency. With evolving trends and new technologies on the horizon, knowing your options can help you make a confident, future-proof choice.
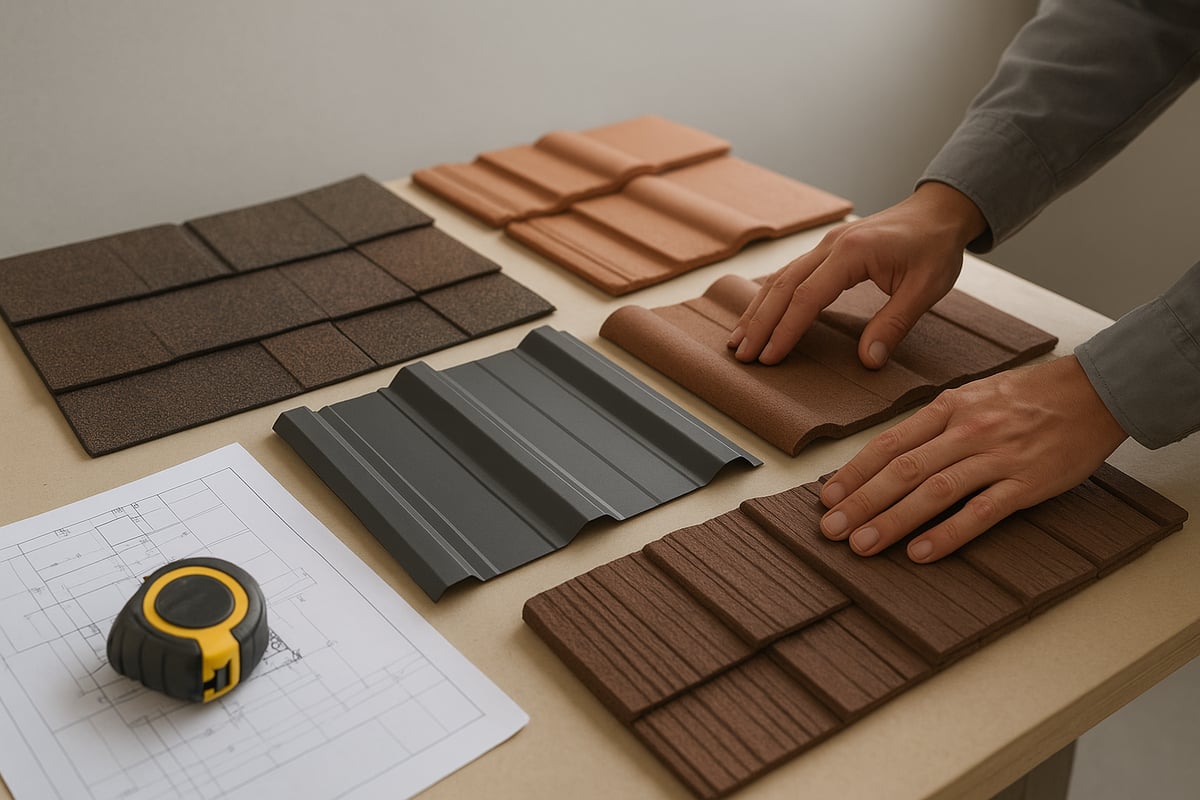
Popular Roofing Material Options and Their Pros/Cons
The market for roof replacement materials in 2026 is broader than ever. Homeowners and businesses can choose from classic and advanced options, each with unique strengths.
| Material | Lifespan | Cost Range (per sq ft) | Pros | Cons |
|---|---|---|---|---|
| Asphalt Shingles | 20–25 years | $3–$6 | Affordable, easy install, many styles | Shorter lifespan |
| Architectural | 30–50 years | $4–$8 | Durable, attractive, better warranty | Higher cost |
| Metal | 40–70 years | $6–$14 | Long-lasting, fire-resistant, energy efficient | Noisy in rain, higher upfront cost |
| Wood Shakes | 30+ years | $7–$12 | Natural look, good insulation | Not fire-safe, maintenance |
| Slate/Tile | 50+ years | $10–$25 | Premium, very durable, unique style | Heavy, expensive |
| Synthetic/Composite | 30–50 years | $7–$12 | Lightweight, mimics premium, mid-cost | Newer, less proven |
Asphalt shingles remain the most popular for roof replacement due to their cost-effectiveness and variety. Architectural shingles offer improved durability and style, while metal roofing is gaining traction for its longevity and energy savings. Wood shakes deliver classic beauty but need more care, and slate or tile provide unmatched durability for those willing to invest. Synthetic options replicate premium looks at a lighter weight.
For a deeper dive into these choices, see the Construction Roofing Materials Guide.
Material Selection Based on Climate, Roof Design, and Trends
The right material for your roof replacement depends on your location, roof design, and the latest innovations.
Low-slope or flat roofs often require membranes or coatings, while steep pitches allow for shingles, tiles, or metal. In hot climates, reflective and cool-roof materials can lower attic temperatures and reduce energy bills. Hail-prone regions benefit from impact-resistant shingles or metal panels.
Looking ahead to 2026, sustainability is a top trend. Expect to see more solar-ready shingles, recycled-content materials, and advanced coatings resisting algae or mold. Always check code requirements and HOA rules before choosing your roof replacement material.
For example, Texas homeowners increasingly select impact-resistant shingles and cool coatings to withstand storms and high heat.
Longevity, Maintenance, and Warranty Factors
A successful roof replacement considers not just initial cost, but also how long the roof will last and the care it demands.
Asphalt shingles generally last 20–25 years, while architectural, metal, slate, and tile roofs can exceed 40–50 years with regular inspections and cleaning. Synthetic materials offer a middle ground with lower maintenance needs.
Review manufacturer and installer warranties closely. Many premium materials come with transferable warranties, adding value if you sell your property. For instance, architectural shingles may offer a 50-year warranty, compared to just 20 years for basic asphalt. Concrete, slate, and clay tiles, when maintained, can last over half a century.
Understanding warranty coverage is essential for long-term peace of mind during your roof replacement project.
Planning and Preparing for Roof Replacement
Proper planning is crucial for a successful roof replacement. Taking time to prepare ensures your project runs smoothly, avoids delays, and maximizes the value of your investment. Each step, from inspection to neighbor communication, protects your property and delivers lasting results.
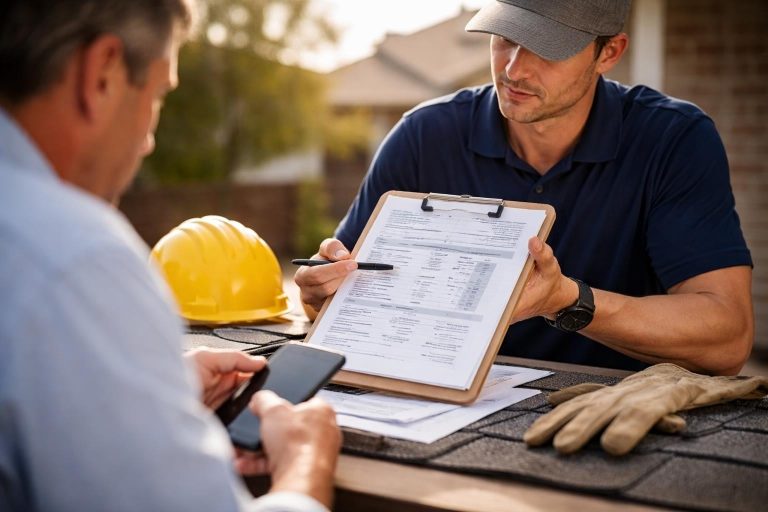
Step 1: Scheduling Inspections and Gathering Quotes
The first step in roof replacement is arranging a thorough inspection. A professional assessment, with photo documentation, reveals hidden issues and provides an accurate project scope. DIY inspections can help, but expert eyes catch problems homeowners may overlook.
Next, request detailed quotes from at least three reputable contractors. Compare pricing, timelines, materials, and warranty terms. Review each contractor’s credentials, insurance, and portfolio of completed roof replacement projects.
Key questions to ask include:
- What is the estimated project timeline?
- Which materials are recommended for my roof replacement?
- Who will be on-site managing the crew?
- Are you fully insured and licensed?
- What warranties do you offer?
For example, three bids may reveal a $4,000 difference for the same roof replacement project. Careful comparison helps you avoid unnecessary costs and ensures quality.
Step 2: Selecting a Reliable Roofing Contractor
Choosing the right contractor is essential for a smooth roof replacement. Always verify licensing, insurance, and manufacturer certifications. Contractors with in-house crews often deliver more consistent results than those relying on subcontractors.
Look for strong communication skills and insist on a clear, written contract outlining all roof replacement details. Ask for local references and check online reviews to evaluate past performance.
Red flags to watch for:
- High-pressure sales tactics
- Vague or shifting pricing
- Lack of references or poor online reputation
Local expertise is vital. Contractors familiar with your area’s weather and building codes are equipped to handle unique challenges. For example, Texcore Construction uses in-house, insured crews for every roof replacement, ensuring quality and safety.
Why Choose Texcore Construction for Your Roof Replacement
Texcore Construction, based in Fort Worth, specializes in fast, reliable roof replacement for both residential and commercial properties. All installations are performed by licensed, in-house crews, never subcontractors, ensuring high craftsmanship standards and clean, safe job sites.
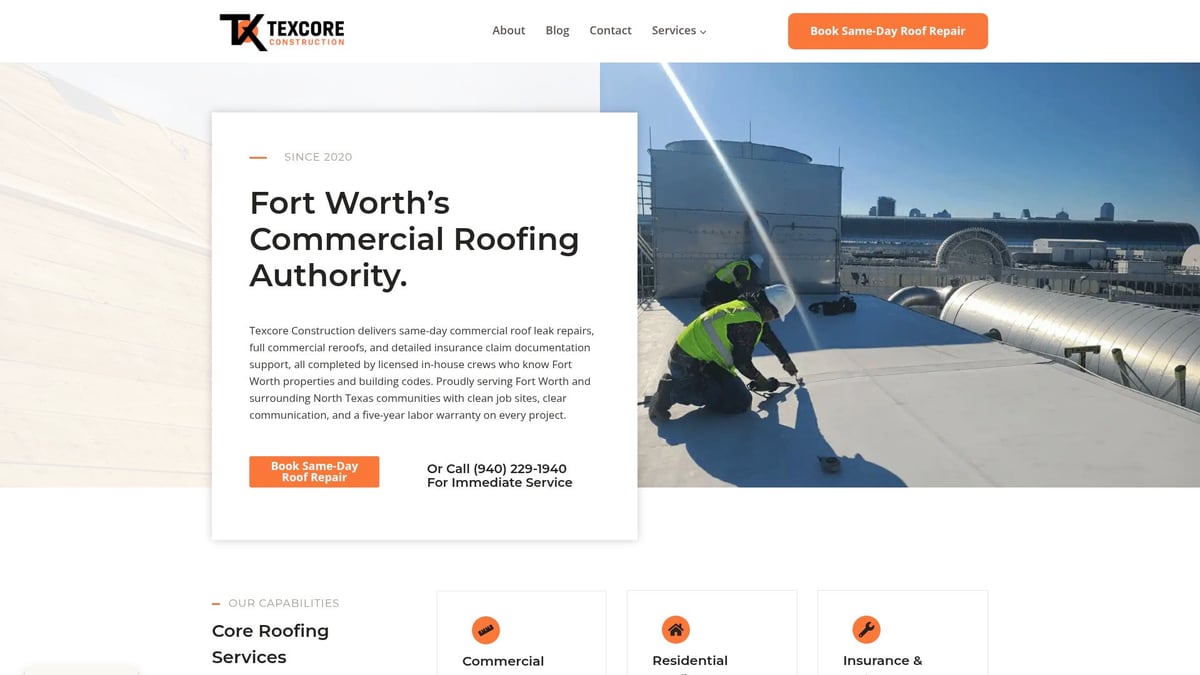
Services include same-day leak repairs, complete reroofs, storm response, and insurance claim support. Each roof replacement comes with photo documentation, transparent recommendations, and a five-year labor warranty.
With deep knowledge of local codes, the insurance process, and advanced roofing systems, Texcore Construction is a trusted partner for property owners who want long-term performance and peace of mind.
Step 3: Permitting, Scheduling, and Material Planning
Once you select your contractor, the next phase of roof replacement involves permitting and planning. Your contractor typically manages permits and coordinates with city officials or your homeowners’ association.
Finalize your shingle color and material choices early to prevent delivery delays. Plan for dumpster placement, site protection, and clear access to the roof replacement area.
Contractors will coordinate the timeline, aiming to minimize disruption and avoid weather-related setbacks. For instance, scheduling permit approval and material delivery in advance helps keep your roof replacement on track.
Step 4: Preparing Your Property and Communicating with Neighbors
Before your roof replacement begins, clear driveways, patios, and yards of valuables or obstructions. Protect landscaping, outdoor furniture, and ensure pets are safe during construction.
Inform neighbors about the upcoming roof replacement, as noise and parking may be temporarily affected. Arrange alternate parking or access for family members if needed.
Contractors often provide a checklist to help homeowners prepare for roof replacement day. Taking these simple steps ensures a smooth process and keeps both your property and neighborhood running smoothly.
The Roof Replacement Process: Step-by-Step
A successful roof replacement project unfolds through a series of well-defined stages, each critical to ensuring durability and value. Understanding what happens at every step empowers homeowners to make informed decisions, set clear expectations, and protect their investment for years to come.
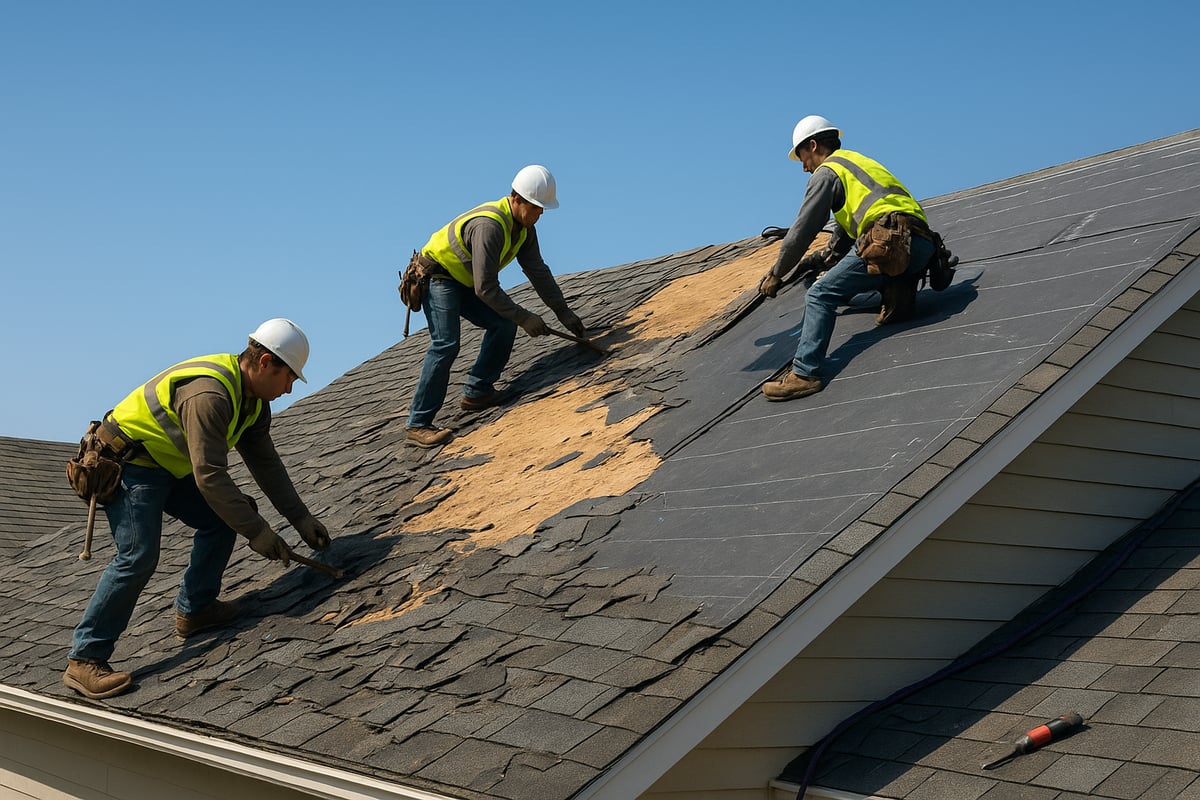
Step 1: Removal of Old Roofing and Inspection
The first phase of roof replacement is the careful removal of existing roofing materials. Crews strip away shingles, underlayment, and flashing, exposing the roof deck beneath. This process requires attention to detail, as hidden issues often become visible only after the old layers are gone.
During removal, debris is managed using dumpsters or trucks. Reputable contractors may recycle asphalt shingles where facilities exist. Once cleared, the roof deck undergoes a thorough inspection for rot, water damage, or structural weakness.
Key inspection points include:
- Checking for soft spots or sagging
- Identifying damaged or delaminated decking
- Examining fastener integrity
Any compromised decking is replaced or reinforced before new materials are installed. For example, if rot is detected around roof valleys, those sections are cut out and new plywood is secured, ensuring a stable foundation for the rest of the roof replacement process.
This stage is crucial for preventing future leaks and extending the lifespan of your new roof.
Step 2: Installation of Underlayment and Flashing
With a sound deck in place, the next step is to install protective underlayment and flashing. The underlayment acts as a moisture barrier between the decking and shingles, safeguarding against water intrusion.
The process includes:
- Applying ice and water shield in vulnerable areas like eaves and valleys
- Laying synthetic or felt underlayment across the deck
- Installing or upgrading flashing around chimneys, vents, and roof valleys
Quality underlayment and precise flashing installation are vital for long-term performance. For added protection, contractors may use advanced self-sealing barriers in storm-prone regions. This careful preparation ensures your roof replacement stands up to harsh weather and everyday wear.
Step 3: Installing New Roofing Materials
The installation of new roofing materials is where the transformation becomes visible. Crews start with starter shingles at edges, then lay field shingles in staggered rows to optimize water shedding and wind resistance.
Key steps include:
- Using proper nailing patterns as specified by manufacturers
- Adding hip and ridge shingles for a finished look
- Installing upgraded ventilation components, such as ridge vents or powered fans
Ventilation improvements are often made during this stage to support attic health and energy efficiency. For example, installing new architectural shingles with integrated ridge vents can reduce attic temperatures and improve indoor comfort. Each detail in the roof replacement process contributes to the system’s overall durability and curb appeal.
Step 4: Clean-Up, Final Inspection, and Walk-Through
After installation, a professional crew conducts an extensive clean-up of the property. This includes using magnetic sweepers to collect nails, removing debris, and ensuring all landscaping and driveways are free from construction materials.
A detailed final inspection follows, during which the contractor reviews the entire roof for workmanship, code compliance, and proper installation of all components. Homeowners are encouraged to participate in a walk-through, ask questions, and review photo documentation of the completed project.
Typical punch-list items addressed before sign-off:
- Ensuring gutters and downspouts are clear
- Verifying that all flashing is secure
- Checking for any cosmetic concerns
This step gives peace of mind that the roof replacement meets or exceeds expectations and local building codes.
Step 5: Understanding Your Warranty and Maintenance Plan
Once the project is complete, the focus shifts to protection and maintenance. Homeowners should receive detailed documentation outlining both material and labor warranties. These warranties vary by manufacturer and installer, so it is important to understand coverage limits, exclusions, and maintenance requirements.
A helpful comparison is provided below:
| Warranty Type | Typical Coverage | Duration | Transferable? |
|---|---|---|---|
| Material | Shingles, underlayment | 20-50 years | Often |
| Labor | Installation defects | 2-10 years | Sometimes |
Homeowners should also receive a maintenance checklist and inspection schedule to maximize the life of their roof replacement. For more details, visit Roofing Warranty Information, which explains common warranty features and how to register or transfer coverage.
Proper documentation and routine care ensure your investment remains protected, supporting both long-term performance and home value.
Post-Installation: Maximizing Roof Performance and Value
Proper post-installation care is vital to ensure your roof replacement delivers long-lasting protection and value. Once your new roof is in place, a proactive approach to maintenance, documentation, and upgrades can help maximize your investment and safeguard your property for years to come.
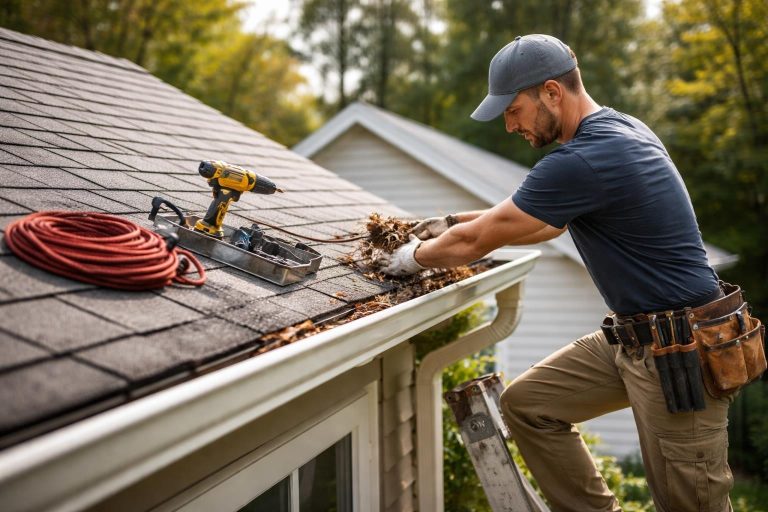
Routine Maintenance and Inspection Schedule
After a roof replacement, establishing a consistent maintenance schedule is essential. Begin with annual visual inspections, ideally each spring or fall. Look for missing, curling, or damaged shingles, along with any accumulation of debris in valleys or gutters.
- Clean gutters and downspouts regularly to prevent water backup.
- Remove moss or algae growth promptly using approved cleaning methods.
- Observe attic spaces for signs of leaks or inadequate ventilation.
It is wise to schedule a professional roof inspection after major storms, especially if your area is prone to hail or high winds. Professionals may spot hidden issues that could compromise your roof replacement if left unchecked. Preventive maintenance, such as sealing minor cracks or replacing worn flashing, often extends the roof’s lifespan by five to ten years.
Keep a maintenance log with dates, findings, and repairs. This documentation can be invaluable should you need to make an insurance claim or transfer your warranty to a new owner. A well-maintained roof replacement not only offers peace of mind but also preserves your property’s structural integrity.
Addressing Common Issues and Minor Repairs
Even after a quality roof replacement, minor issues may arise over time. Catching these early is key to avoiding costly damage.
- Inspect for loose shingles or flashing after heavy weather.
- Address small leaks or water stains immediately.
- Repair minor punctures or sealant failures without delay.
While some homeowners can tackle small tasks, such as replacing a single shingle, more complex repairs should be left to professionals. This protects your roof replacement warranty and ensures repairs meet industry standards.
Prompt action can prevent a minor leak from escalating into major water damage. Always follow the manufacturer’s maintenance guidelines to keep your roof replacement performing at its best.
Energy Efficiency and Upgrades
A modern roof replacement can significantly improve your home's energy efficiency. Cool-roof materials and reflective coatings help reduce attic temperatures, lowering summer cooling costs by up to 15 percent.
- Upgrade attic insulation and ventilation to enhance comfort.
- Consider integrating solar panels or solar-ready shingles for future energy independence.
- Install ridge or static vents for optimal airflow.
These upgrades not only reduce utility bills but also boost the overall value of your roof replacement. By planning for future energy needs, you ensure your roof remains a high-performing asset for years to come.
Insurance, Documentation, and Future Claims
Meticulous documentation is crucial after your roof replacement. Keep all records of installation, warranties, inspection reports, and repair receipts in a safe, easily accessible place.
- Take clear, dated photos of your new roof and any subsequent repairs.
- Maintain a file of all correspondence with your contractor.
- Record storm events and resulting inspections for future reference.
If your property sustains storm damage, detailed documentation streamlines the insurance claim process. Many contractors provide photo-documented reports to support your claim. Well-organized records make it easier to prove the age, quality, and maintenance of your roof replacement, increasing the likelihood of a fair settlement.
Enhancing Curb Appeal and Property Value
A successful roof replacement does more than protect your home—it enhances curb appeal and increases resale value. Selecting shingle colors and styles that complement your property and neighborhood creates a cohesive, attractive look.
- Architectural shingles or metal roofing often boost appraisal value.
- Consistent maintenance preserves the new appearance.
- Professional installation reassures buyers about long-term performance.
According to recent roofing industry statistics, homeowners can expect a return on investment of up to 68 percent from a quality roof replacement at resale. This makes roof replacement one of the most impactful improvements for property value and buyer confidence.
Staying Ahead of Roofing Trends and Technology
The roofing industry continues to evolve, with new materials and technologies emerging each year. In 2026, trends include sustainable materials, integrated solar options, and smart roof monitoring systems for real-time performance insights.
- Consider solar-ready shingles for future upgrades.
- Monitor for new regulations or incentives in your area.
- Stay informed about advances by reviewing resources like 2026 Roofing Trends.
By staying proactive, you ensure your roof replacement remains a strong, future-ready investment.
You’ve seen how a well planned roof replacement can protect your property, boost value, and prevent costly surprises—especially as we look ahead to 2026. If you’re wondering whether your own roof needs attention or you just want peace of mind before taking the next step, you don’t have to guess. Let’s make the process easy and clear.
Schedule your complimentary, certified inspection with Texcore Construction’s expert team—we’ll provide a detailed assessment, photo documentation, and honest recommendations so you can make the best choice for your home or business.
Schedule Your Free Certified Roof Inspection