Wind Damage Roof Repair: A Complete Guide
Wind damage to roofing systems ranks among the most common and costly forms of property damage across Texas and nationwide. High winds can lift shingles, tear flashing, compromise structural integrity, and create vulnerabilities that lead to water intrusion and escalating repair costs. Understanding how wind affects different roofing materials, recognizing damage early, and taking prompt action can mean the difference between a straightforward repair and a full roof replacement. This comprehensive guide covers everything property owners need to know about wind damage roof repair, from initial assessment through final restoration and preventive measures.
Understanding How Wind Damages Roofs
Wind interacts with roofing systems in complex ways that depend on wind speed, direction, roof design, and material quality. The most vulnerable areas include roof edges, corners, and ridges where wind forces concentrate and create uplift pressure.
The Mechanics of Wind Uplift
When wind flows over a roof surface, it creates negative pressure on the top side while positive pressure builds underneath. This pressure differential generates uplift force that can exceed the weight of roofing materials, especially when installation methods are substandard or materials have degraded over time. Shingles, tiles, and membrane systems all rely on proper fastening to resist these forces, which is why installation quality directly impacts wind resistance.
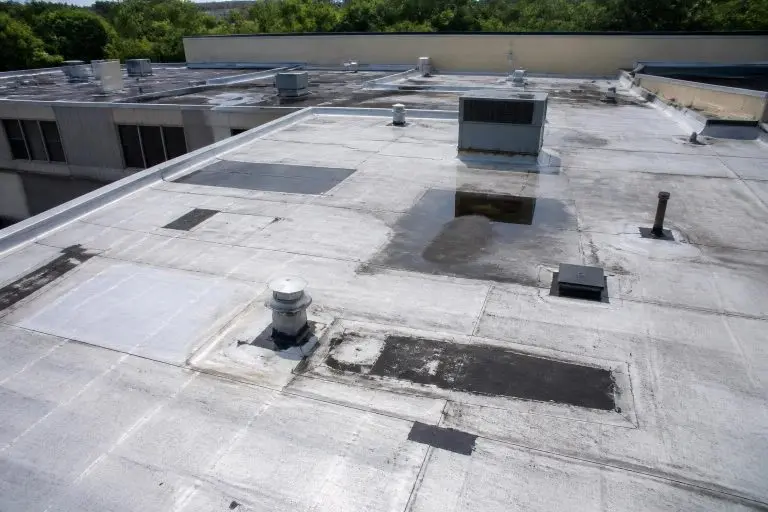
Roof geometry significantly influences wind behavior. Low-slope commercial roofs experience different wind patterns than steep residential slopes, and architectural features like parapets, chimneys, and HVAC units create turbulence zones where damage concentrates. The National Weather Service provides detailed information about wind patterns during severe weather events and how they impact structures.
Common Types of Wind Damage
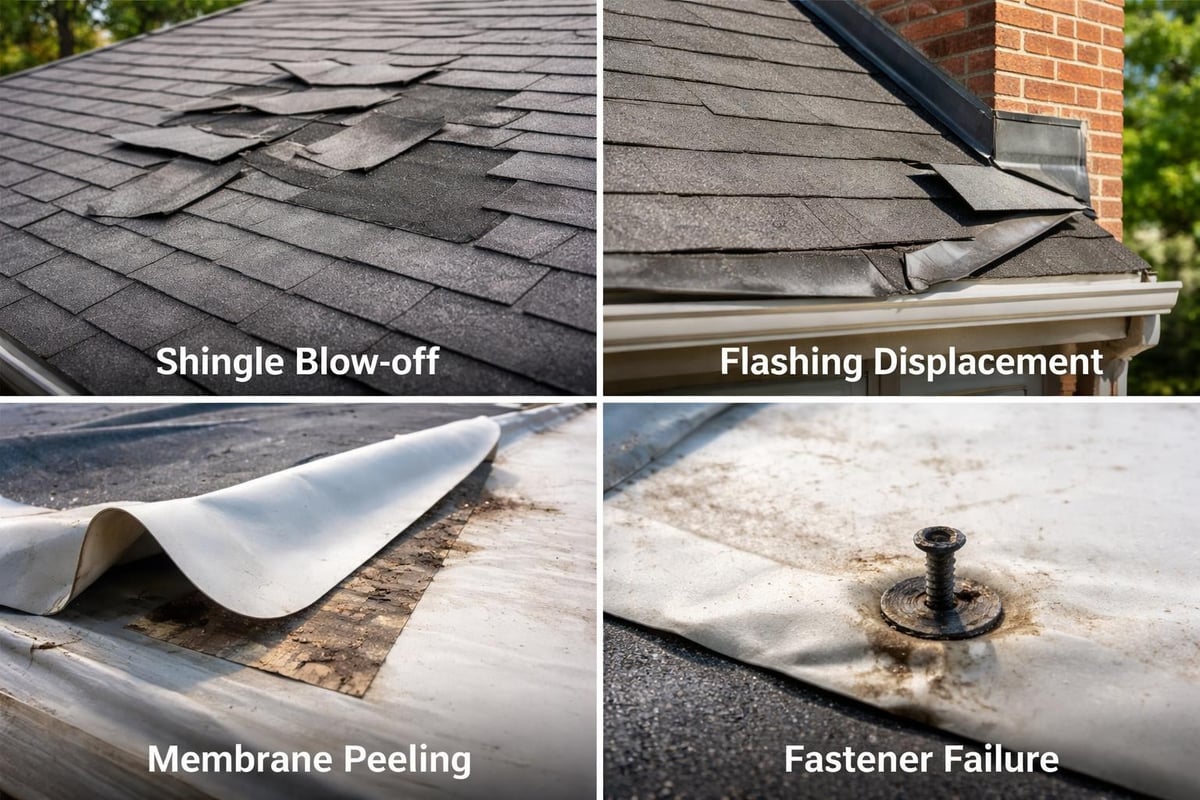
Wind damage manifests in several distinct patterns that require different repair approaches:
- Shingle blow-off: Complete removal of individual shingles or sections exposing underlayment or decking
- Lifting and creasing: Shingles remain attached but develop permanent creases from repeated uplift cycles
- Fastener failure: Nails or staples pull through material creating punctures and weak points
- Flashing displacement: Metal flashing around penetrations, valleys, and edges tears loose or bends
- Membrane peeling: Single-ply roofing systems separate from adhesive or fastener patterns
- Granule loss: Asphalt shingle protective granules strip away exposing underlying mat
Each damage type requires specific repair techniques and materials. Attempting to patch severely creased shingles, for example, often fails within months because the material integrity has been compromised.
Initial Damage Assessment and Documentation
Thorough assessment forms the foundation of effective wind damage roof repair. Property owners should conduct ground-level inspections after any significant wind event, looking for obvious signs like missing shingles in gutters, exposed underlayment, or displaced flashing visible from below.
Safety Considerations During Inspection
Never attempt roof access during high winds or immediately after severe weather. Wait until conditions stabilize completely, and consider professional inspection rather than personal roof access. Falls from roofs represent a leading cause of serious injury, and damaged roofing materials can be unstable even when they appear intact.
Ground-level inspection focuses on:
- Checking gutters and downspouts for shingle granules or pieces
- Examining the yard for debris that originated from your roof
- Looking for daylight through roof decking from attic spaces
- Identifying water stains on ceilings or walls indicating active leaks
- Documenting all visible damage with dated photographs
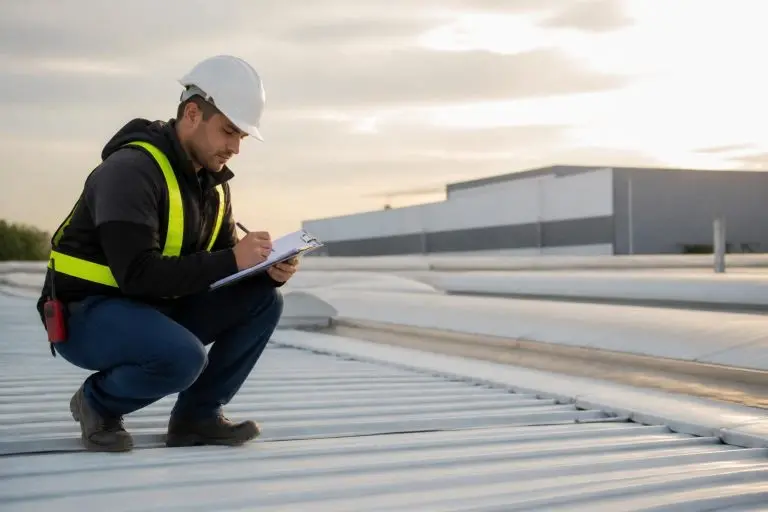
Professional roof inspections provide comprehensive damage assessment that homeowners cannot safely complete. insured contractors access all roof areas, identify hidden damage, measure affected zones, and document findings for insurance purposes. Understanding what to expect from a roof inspection service helps property owners prepare and ask relevant questions.
Documentation Best Practices
Insurance claims require detailed documentation showing damage extent, location, and causation. Effective documentation includes:
| Documentation Type | What to Capture | Why It Matters |
|---|---|---|
| Photographs | Wide shots showing context, close-ups of specific damage, before photos if available | Establishes damage scope and validates claim |
| Written notes | Date, time, weather conditions, initial observations | Creates timeline and links damage to specific event |
| Professional reports | insured contractors assessment with measurements and recommendations | Provides expert opinion and repair cost basis |
| Weather data | National Weather Service reports showing wind speeds and event timeline | Confirms causation for insurance purposes |
Modern technology enhances documentation accuracy. Aerial photography captured by professional services like Extreme Aerial Productions provides comprehensive overhead views that reveal damage patterns invisible from ground level, creating powerful evidence for insurance adjusters and repair planning.
Working With Insurance on Wind Damage Claims
Most standard homeowners and commercial property insurance policies cover wind damage, though coverage terms, deductibles, and claim processes vary significantly. The Insurance Information Institute offers detailed guidance on windstorm coverage and claims procedures that property owners should review before filing.
Filing Effective Claims
Prompt claim filing supporting your insurance claim with thorough documentation and prevents disputes about damage timing. Contact your insurance provider immediately after discovering wind damage, even before obtaining repair estimates. Insurers typically assign adjusters within days and schedule property inspections to assess damage and determine coverage.
Professional roofing contractors experienced in insurance work provide invaluable support during this process. They understand policy language, documentation requirements, and negotiation strategies that maximize legitimate claim payouts. When working with Roofing Insurance Claims specialists, property owners benefit from expert damage assessment, complete documentation, and direct communication with adjusters.
The claims process follows predictable stages:
- Initial contact: Report damage and receive claim number
- Adjuster inspection: Insurance representative assesses damage and determines coverage
- Estimate reconciliation: Compare adjuster and contractor estimates, negotiate differences
- Approval and payment: Receive initial payment (typically actual cash value minus deductible)
- Repair completion: Complete work and submit final documentation
- Final payment: Receive recoverable depreciation after proving repair completion
Common Coverage Issues
Wind damage claims sometimes encounter disputes about damage extent, causation, or repair scope. Understanding common issues helps property owners prepare:
- Pre-existing damage: Insurers may deny coverage for deterioration that predates the wind event
- Matching materials: Discontinued shingles or colors create matching challenges that affect coverage
- Code upgrades: Building code changes since original construction may require upgrades not fully covered
- Cosmetic damage: Some policies exclude purely aesthetic damage without functional impact
Detailed documentation, professional assessment, and clear communication resolve most disputes. In complex cases, public adjusters or legal counsel may be necessary to protect property owner interests.
Wind Damage Roof Repair Techniques and Materials
Effective wind damage roof repair depends on damage severity, roofing material type, and long-term performance goals. Repairs range from simple shingle replacement to complete system restoration, each requiring specific techniques and quality materials.
Asphalt Shingle Repair Methods
Asphalt shingles dominate residential roofing, making shingle wind damage roof repair the most common repair type. Minor damage affecting isolated shingles can be addressed through targeted replacement:
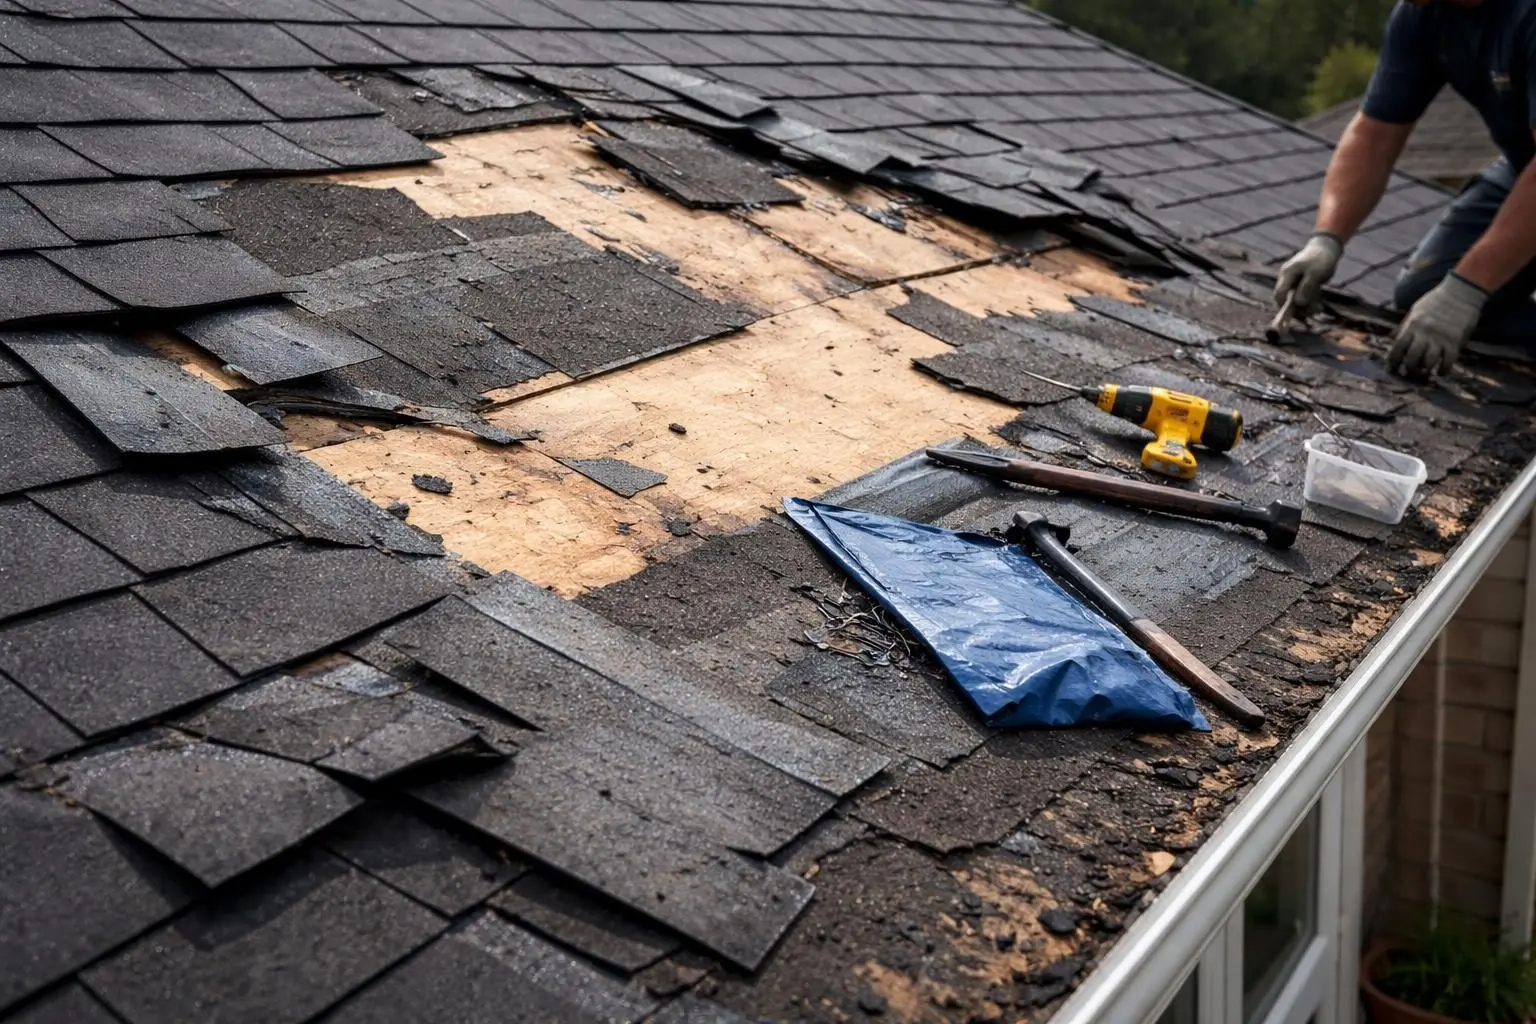
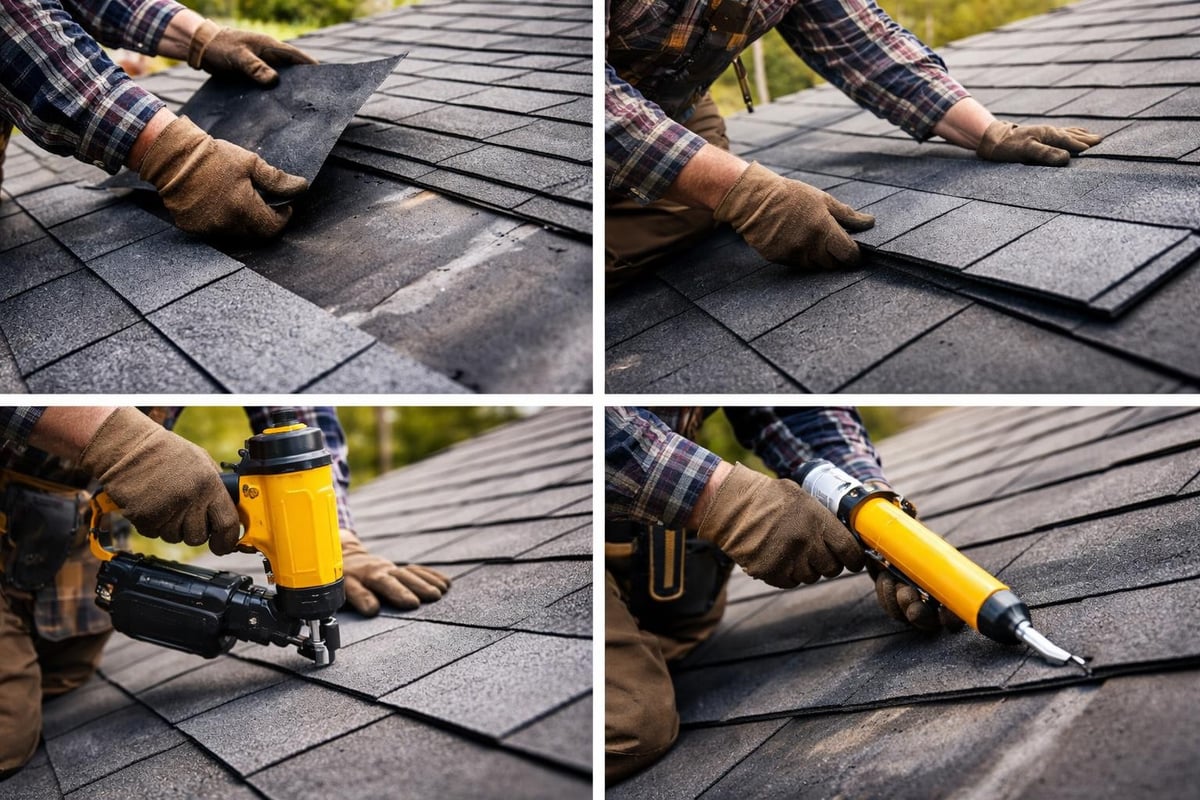
Step-by-step shingle replacement:
- Remove damaged shingles by lifting overlapping courses and removing fasteners
- Inspect and repair underlayment if compromised
- Slide new shingles into position matching existing pattern
- Secure with appropriate fastener type and quantity per manufacturer specifications
- Seal tabs and edges with roofing cement to prevent future uplift
- Verify color and texture match existing roof appearance
When damage affects multiple zones or entire roof sections, partial re-roofing becomes more cost-effective than individual repairs. This approach ensures consistent material quality, proper installation, and uniform appearance while avoiding the patchwork look of multiple small repairs.
Commercial Roofing System Repairs
Commercial flat and low-slope roofs use different materials requiring specialized repair approaches. TPO, EPDM, and modified bitumen systems each demand material-specific techniques:
- TPO repairs: Heat-welded patches creating permanent thermoplastic bonds
- EPDM repairs: Cleaned and primed surfaces with adhesive-bonded patches
- Modified bitumen: Torch-applied or cold-process patches matching base material
- Metal roofing: Panel replacement or seam repair using compatible fasteners and sealants
Professional contractors maintain relationships with manufacturers and distributors ensuring access to matching materials and proper repair components. Attempting repairs with incompatible products voids warranties and creates future failure points.
Flashing and Penetration Repairs
Flashing failures represent critical wind damage points because they protect vulnerable roof penetrations and transitions. Proper flashing repair requires:
| Flashing Location | Common Wind Damage | Repair Approach |
|---|---|---|
| Chimney | Separation from masonry, bent counter flashing | Remove and replace with properly sized material, seal with compatible caulk |
| Valley | Torn or displaced valley metal | Install new valley flashing with proper overlap and fastener spacing |
| Pipe boots | Cracked rubber seals, loose base flashing | Replace entire boot assembly, seal to roof surface |
| Edge metal | Bent drip edge, loosened fascia flashing | Straighten and refasten or replace damaged sections |
| Skylights | Damaged curb flashing, broken seals | Rebuild flashing layers, replace gaskets and sealants |
Never attempt to patch severely damaged flashing with caulk or tape. These temporary measures fail quickly and allow water intrusion that damages roof decking and interior spaces.
Structural Considerations and Decking Repairs
Severe wind events sometimes cause structural damage beyond surface materials. Lifted shingles may indicate underlying decking failure, broken trusses, or compromised fastener connections requiring immediate attention.
Identifying Structural Damage
Warning signs of structural wind damage include:
- Sagging roof sections or visible deflection
- Cracked or split roof decking visible from attic spaces
- Separation between decking and rafters or trusses
- Interior ceiling cracks following roof framing patterns
- Unusual sounds like creaking or popping during wind events
Structural damage requires engineering assessment before proceeding with surface repairs. Loading new roofing materials onto compromised framing creates safety hazards and worsens existing problems. Licensed structural engineers evaluate damage severity, specify necessary repairs, and ensure compliance with building codes.
Decking Replacement Standards
When wind damage exposes or destroys roof decking, replacement must meet current building codes even if original construction used different standards. Modern codes typically require:
- Minimum 7/16-inch oriented strand board (OSB) or 1/2-inch plywood
- H-clips between unsupported panel edges on rafters spaced over 16 inches
- Specific nail or screw patterns based on wind zone and roof slope
- Proper gap spacing for thermal expansion
Quality decking installation directly impacts future wind resistance. Rushed repairs using substandard materials or improper fastening create vulnerabilities that fail during subsequent wind events.
Preventive Measures and Wind Mitigation
Property owners can significantly reduce wind damage vulnerability through proactive maintenance and targeted upgrades. InterNACHI’s wind mitigation guide details inspection criteria and improvement strategies that enhance roof wind resistance.
Maintenance Practices That Reduce Wind Damage
Regular maintenance identifies and addresses small issues before they become wind damage entry points:
- Quarterly inspections: Check for loose, damaged, or missing shingles requiring attention
- Seal inspection: Verify sealant integrity around flashing, penetrations, and shingle tabs
- Fastener assessment: Look for exposed or raised fasteners indicating potential failure
- Tree management: Trim branches overhanging roof surfaces and remove dead trees
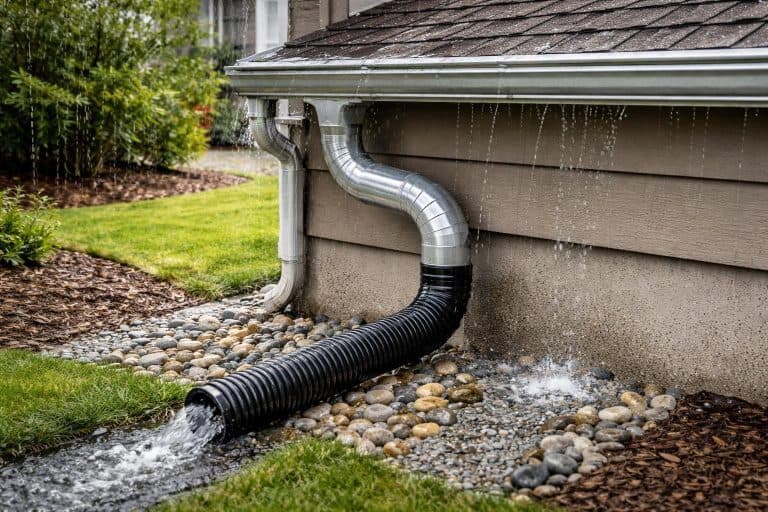
- Debris removal: Clear gutters, valleys, and roof surfaces preventing water pooling
Seasonal preparation before storm season amplifies maintenance effectiveness. The American Red Cross recommends comprehensive property preparation including roof assessment and minor repairs before hurricane season begins.
Upgrade Options for Enhanced Wind Resistance
When replacing wind-damaged roofing, consider upgrades that exceed minimum code requirements:
Material upgrades:
- Impact-resistant shingles rated for Class 4 hail resistance
- Enhanced fastener patterns using six nails per shingle instead of four
- Upgraded underlayment providing secondary water barrier
- Sealed shingle tabs preventing uplift at edges
Structural improvements:
- Hurricane straps connecting roof framing to wall structures
- Reinforced roof-to-wall connections exceeding code minimums
- Braced gable ends reducing lateral movement
- Secondary water barriers at vulnerable areas
These improvements often qualify for insurance premium discounts offsetting installation costs over time. Many insurers reduce wind and hail coverage premiums by 10-30% for documented wind mitigation features.
Timing and Emergency Response Considerations
Wind damage roof repair urgency depends on damage severity and weather forecasts. Minor cosmetic damage can wait for contractor scheduling, but active leaks or exposed decking require immediate response preventing further deterioration.
Emergency Tarping and Temporary Repairs
When wind damage creates immediate water intrusion risks, temporary protection prevents catastrophic interior damage. Professional emergency tarping involves:
- Assessing damage extent and identifying all vulnerable areas
- Selecting appropriate tarp size covering damage with adequate overlap
- Securing tarps with proper fastening avoiding additional roof penetrations
- Anchoring against wind uplift using sandbags or mechanical fasteners
- Monitoring tarps regularly and adjusting as needed
Never attempt DIY tarping on steep roofs or during unstable weather. Professional emergency services respond quickly with proper equipment, safety training, and insurance coverage protecting property owners from liability.
Emergency response services provide crucial time-sensitive protection while permanent repairs are planned and scheduled. This two-phase approach prevents minor wind damage from escalating into major restoration projects.
Contractor Selection and Project Timeline
Choosing qualified contractors impacts repair quality, timeline, and long-term satisfaction. Evaluation criteria should include:
| Selection Factor | What to Verify | Red Flags |
|---|---|---|
| Licensing | Active state and local licenses, proper classifications | Unlicensed, claims license unnecessary |
| Insurance | General liability and workers compensation certificates | Inadequate coverage, expired policies |
| References | Recent similar projects, verifiable customer contacts | Refuses references, only website testimonials |
| Warranty | Written labor warranty terms and duration | Verbal promises, short warranty periods |
| Communication | Responsive, detailed written estimates | Pressure tactics, vague pricing |
In-house crews versus subcontractor models significantly affect quality consistency and accountability. Companies completing all work with their own employees maintain better control over craftsmanship, scheduling, and job site conditions.
Project timelines vary based on damage severity, material availability, and weather conditions. Simple repairs may complete in days while complex restorations require weeks. Contractors should provide written timelines with milestone dates and communicate proactively about any delays.
Quality Assurance and Post-Repair Inspection
Completed wind damage roof repair should include thorough inspection verifying work quality and addressing any deficiencies before final payment. Property owners should understand quality standards and inspection criteria ensuring satisfactory results.
Final Inspection Checklist
Comprehensive post-repair inspection covers multiple quality dimensions:
Visual assessment:
- Uniform shingle alignment and consistent exposure
- Proper flashing installation at all penetrations and transitions
- Clean work site with all debris removed
- Matching color and texture with existing materials
Functional verification:
- Proper water flow toward gutters and drainage points
- Secure fastening without overdriven or exposed fasteners
- Sealed edges and tabs preventing future uplift
- Adequate ventilation maintained or improved
Documentation review:
- Completed permits and inspection approvals
- Manufacturer certifications for installed materials
- Written warranty documents with clear terms
- Final invoice matching approved estimate
Professional contractors welcome inspection and address legitimate concerns promptly. Resistance to inspection or reluctance to correct deficiencies signals quality problems requiring resolution before final payment.
Long-Term Performance Monitoring
Wind damage roof repair should restore original performance and extend service life beyond pre-damage conditions when upgrades are incorporated. Monitoring repair areas during subsequent weather events verifies effectiveness:
- Inspect repair zones after moderate wind events checking for recurring issues
- Document any concerns with photographs and dates
- Contact contractors immediately if warranty-covered problems develop
- Maintain repair records for future reference and insurance purposes
Quality repairs performed by experienced contractors using proper materials and techniques should perform flawlessly for years. Early failures indicate workmanship or material deficiencies requiring warranty service.
The Role of Design in Wind-Resilient Properties
While immediate wind damage roof repair focuses on restoration, property owners investing in renovations or new construction can collaborate with design professionals creating inherently wind-resilient spaces. Interior and exterior design decisions impact how structures perform during severe weather while maintaining aesthetic appeal and functionality.
Professional design firms like Etch Design Group understand how architectural choices influence structural performance, helping clients make informed decisions that balance beauty with durability. Roof lines, overhangs, material selections, and building geometry all affect wind resistance, and thoughtful design addresses these factors from project inception rather than as afterthoughts.
Material Selection for High-Wind Environments
Roofing material selection dramatically impacts wind damage vulnerability and repair frequency. Fort Worth's climate and weather patterns favor certain materials over others based on wind resistance, thermal performance, and longevity.
Comparing Wind Resistance Across Materials
Different roofing materials offer varying wind resistance characteristics:
- Architectural shingles: Better wind resistance than three-tab designs, rated to 130+ mph when properly installed
- Metal roofing: Excellent wind resistance with interlocking panels rated to 140+ mph, minimal maintenance
- Tile roofing: Heavy weight provides stability but individual tiles can dislodge in extreme winds
- TPO and EPDM: Mechanically fastened or fully adhered systems offer 100-150 mph resistance
- Modified bitumen: Multi-layer systems provide redundancy and excellent wind performance
Installation quality matters more than material ratings. Premium materials installed poorly fail faster than economy materials installed correctly. This reality underscores the importance of contractor selection and quality verification.
Climate-Specific Considerations
Fort Worth's climate presents unique challenges requiring thoughtful material selection. Hot summers, occasional severe thunderstorms, and periodic winter weather create demanding conditions where wind damage roof repair becomes necessary when systems fail.
Property owners should prioritize materials offering:
- Thermal stability handling temperature extremes without degradation
- UV resistance preventing premature aging and brittleness
- Impact resistance surviving hail common in North Texas
- Wind ratings appropriate for local weather patterns
- Proven performance in similar regional applications
Consulting with experienced local contractors provides insights about material performance in Fort Worth conditions. National product ratings don't always translate to local success, and regional experience matters when selecting systems for long-term performance.
Wind damage roof repair requires prompt assessment, thorough documentation, proper technique, and quality materials to restore protection and prevent future problems. Property owners who understand damage patterns, insurance processes, and repair standards make better decisions protecting their investments and ensuring long-term performance. Whether addressing storm damage or planning preventive upgrades, working with experienced professionals ensures repairs meet the highest standards and deliver lasting value. Texcore Construction brings Fort Worth property owners dependable wind damage roof repair backed by in-house crews, detailed documentation, and five-year labor warranties, delivering the speed and craftsmanship you need when weather puts your property at risk.